
The object you imported has all the separate shapes from the DXF, but the are all glued together in one group. The first thing to do here is use the option "Move down in Hierarchy" to select only one of the shapes, then use UnGlue to separate that shape from the group. At this point, I often ungroup ALL of the shapes out to separate objects.
For your own sanity, save the file.
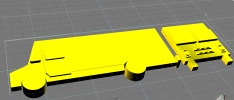
At this point, I usually use the color picker tool and select some bright, primary color. By default, Truespace gives you a Grey object on a Grey background, and the can be difficult to see.
When you have all the items unglued, then go back and select one of them. I tend to work from bigger shapes down to the smaller ones.
Click on the Sweep tool. This turns the shape from an outline to an actual 3d object. Don't worry right now if the object is not thick enough.. we'll fix that.
Right click the Object tool (the pointer) to open the Object Info window, and then click on the Render Options button. Click on Invisible, and the object will temporarily disappear.
Now, work thru the rest of the shapes that you originally imported, turning each one into a 3d shape, and then turning it invisible so you can see the remaining objects.
Save the file.
Click to download SCN file. |
Step 6: rotate and position the shapes